Eclipse IDE is the most widely free open source editor mostly used by Java developers. It comes in many trims packages like Eclipse Java, J2ee, Php, C/C++. It has an array of Plug-ins support by community and commercials licenses.
Now most of the Eclipse IDE has a preconfigured GIT repository integration tool, if your installation has not then you can install it via Updates or you can simply install it via Eclipse Market place.
Installing GIT integration in Eclipse
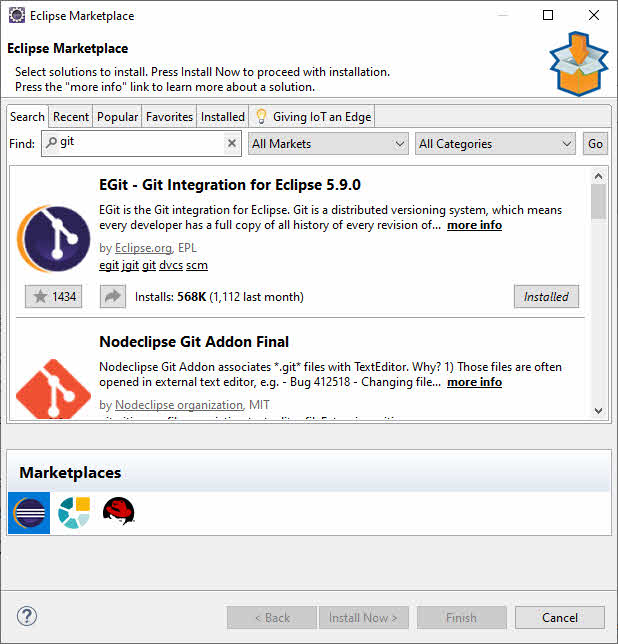
After installation, you can start using it by simply cloning the Remote GIT repository or creating a local GIT repository.
Showing GIT Views
From the Eclipse menu Window–> Show View -> Others you can search different GIT view windows and open them and arrange them as per your preferences.
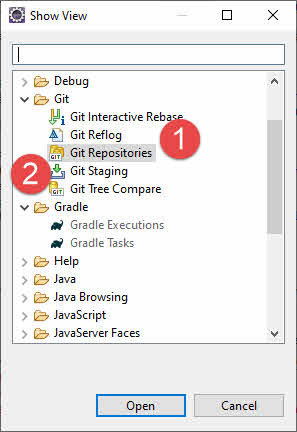
Select the GIT Repository and GIT Staging views. This will open the required views to clone or create a repository.
Cloning a Git Repository
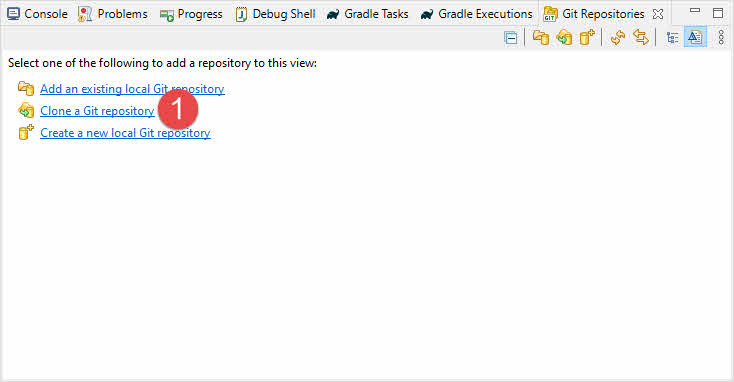
Select the Git Repository view and select clone a repository as shown below.
This will open the following dialog where one can provide information on Git repository to clone with credentials. It has also the option to store credentials in a secret store.
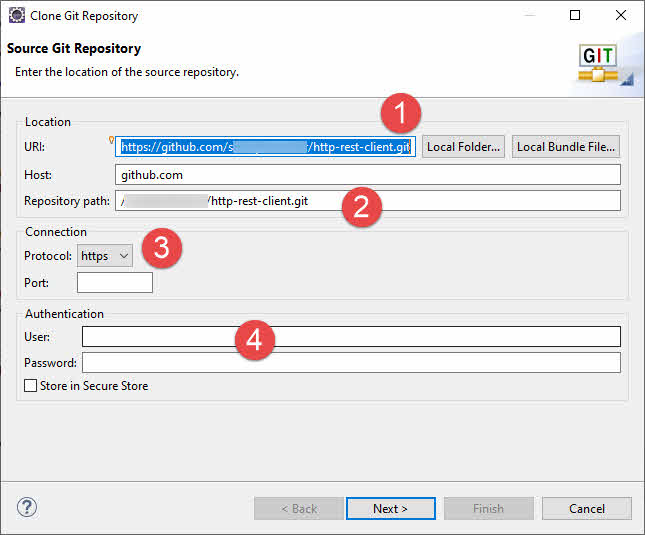
1- You can put a remote git URL or a local folder,
2- It will automatically fill the Host and Repository path in the case of the Github URL.
3- You can select the protocol of your repository, now day HTTPs is the most common and default option for all remote repositories.
4- Optionally you can provide remote repository credentials here or it will ask you at the time of pull/push operation.
After this click on next, it will show you a list of branches to clone, you can select one of them.
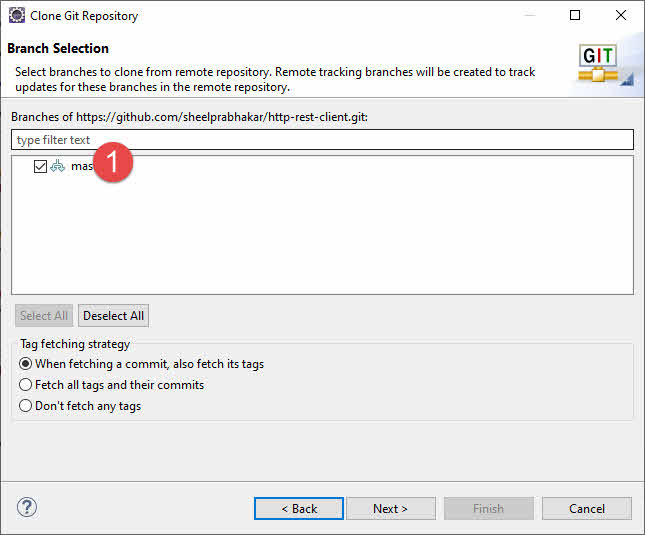
From the above dialog, you can select a branch and option and click next.
After this, it will display a dialog to select local destination folders and remote origin name.
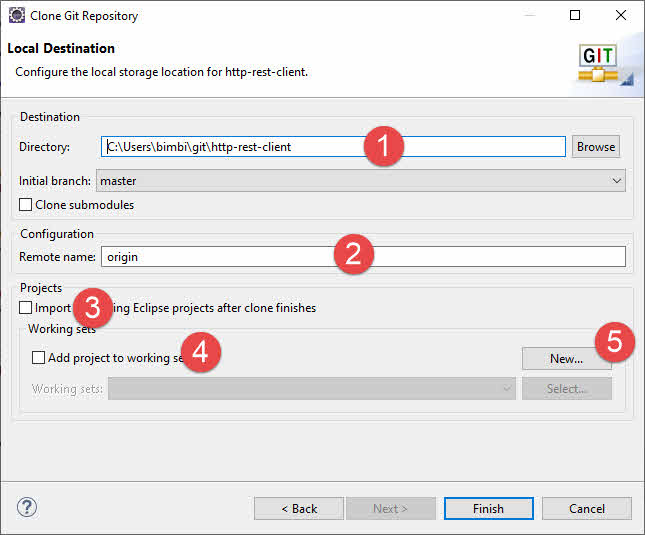
Using the above dialog you can provide a local project path, configure the remote name, and select options to automatically import the eclipse project and optionally create or select a working set.
Committing From Eclipse Git Integration
For committing and pushing your changes in Eclipse Git, open the Git staging view or just right click on the project and select commit, it will open the 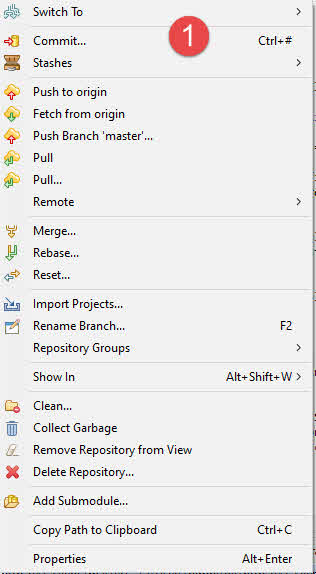 staging view in eclipse.
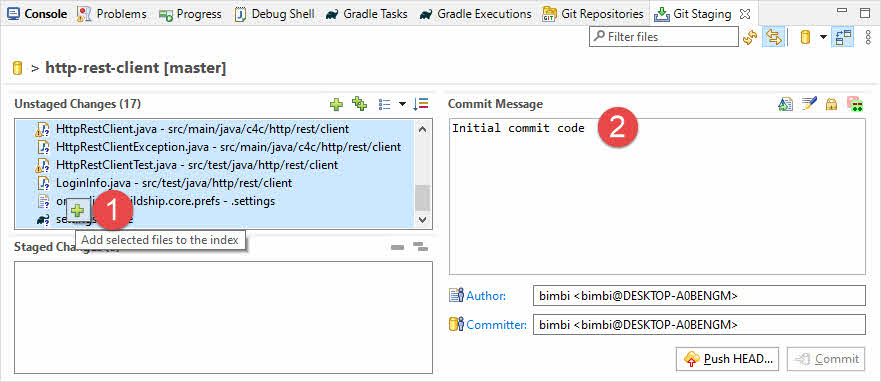
1- From the above dialog, you can add changed filed to the staging view just clicking the plus sign.
2- By writting a commit message you can push code to remote by clicking the Push Head button for the first time.
after this when you will push the code window will look as shown below.
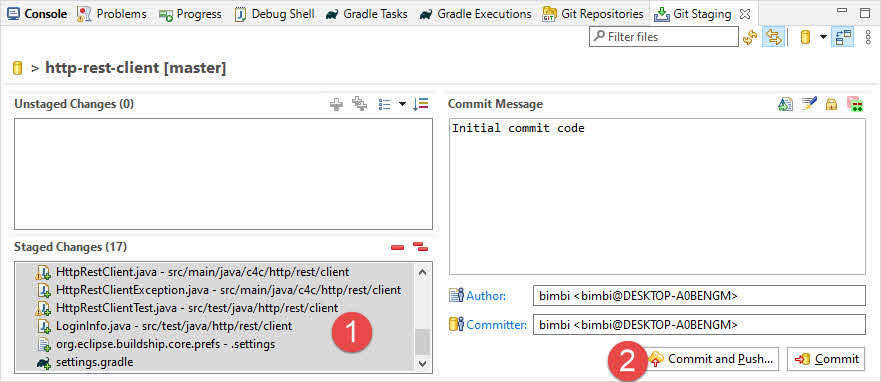
You can just commit code in local or you can commit and push code to the origin. It may ask for remote credentials if not stored or changed.
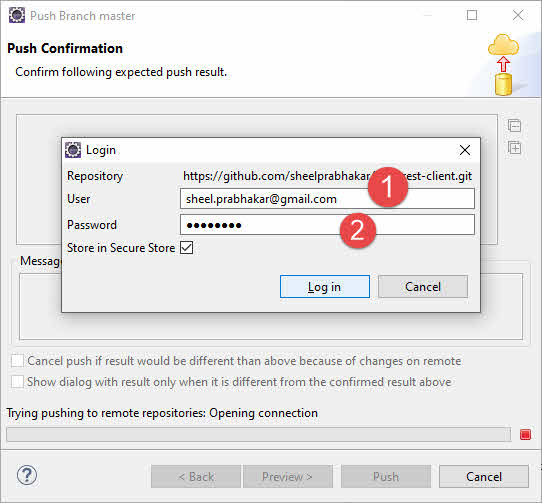
It will open the push confirmation dialog. 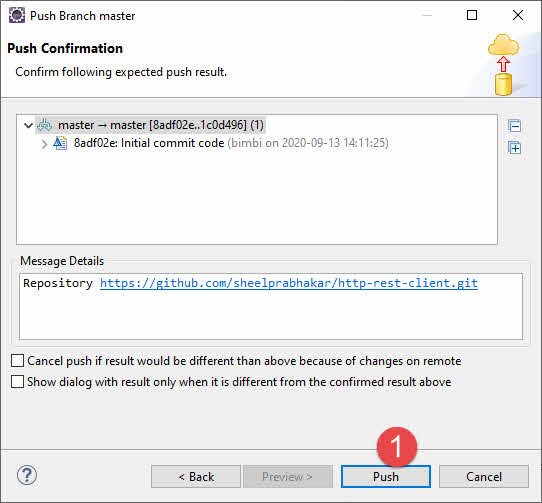 Click the Push button and code will be pushed to the remote git repository.
Eclipse GIT creating New Branch
It’s very easy to create a new branch or switch to a new branch. Just right click on the project and select Team–> switch to the menu option.
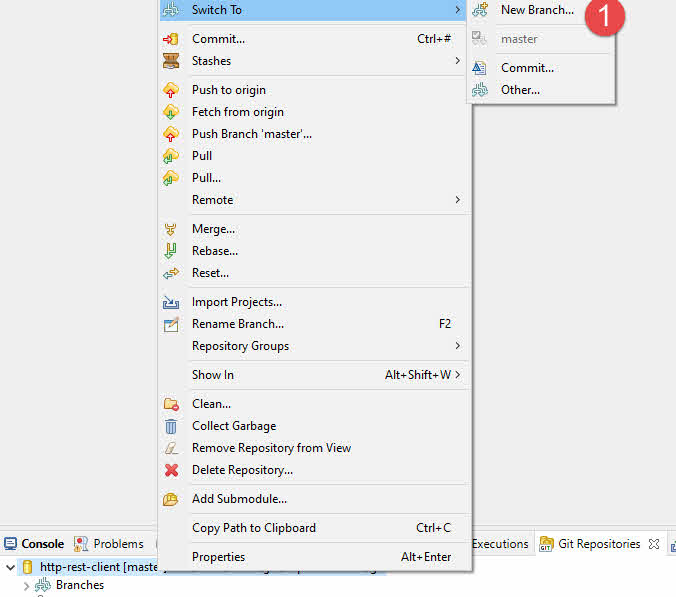
By using the above options you can switch branches or create a new branch.
Using this you can also do merge, pull, and push operations.
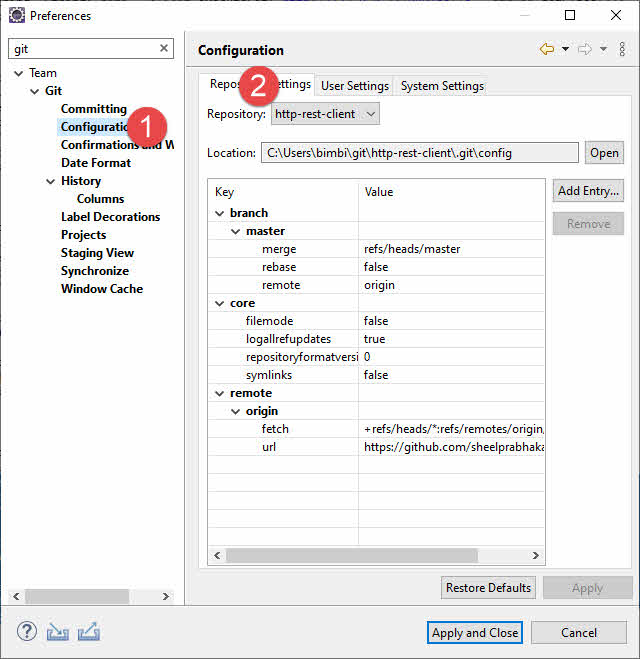
You can change GIT setting from the menu Window–> Options and select or search GIT.
From here you can change all settings like origin, URL, difference comparison tool, etc.
