In this post, I will show how easily you can use the H2 database in memory and file-based in your spring boot application.
For this, I will show you using the Gradle build. For using H2 DB in the spring boot project with JPA you need to include the following dependencies.
Gradle Dependency for H2 database
	implementation 'org.springframework.boot:spring-boot-starter-data-jpa'
	implementation 'org.springframework.boot:spring-boot-starter-web'
	implementation 'com.h2database:h2:2.1.214'
Apart from this, you need to define Spring data source properties in application.properties file.
Use the following properties to define a data source
By default, H2 DB connects with the user sa and empty password but you can give password via property as given below
spring.datasource.url=jdbc:h2:mem:user_info
spring.datasource.driverClassName=org.h2.Driver
spring.datasource.username=sa
spring.datasource.password=password
spring.jpa.database-platform=org.hibernate.dialect.H2Dialect
If you want to populate DB after hibernate initializes the database you can do this by using the following properties.
spring.jpa.defer-datasource-initialization=true
To populate DB you can write insert queries in data.sql file and place them in the resource folder. You can use the DDL statement also, but in this example, I am using @Entity to create the table automatically by JPA.
--CREATE TABLE users (id INT, name VARCHAR(255));

INSERT INTO users VALUES(1, 'SHEEL');
INSERT INTO users VALUES(2, 'ANUPAMA');
@Entity(name= "users")
@Data
public class UserDO {
    @Id
    @Column(name = "id", nullable = false)
    private Long id;

    @Column(name = "name", nullable = false)
    private String name;
}
Enable H2 Console in Spring boot
You can also enable the H2 Console by using the property file.
spring.h2.console.path=/h2-console
spring.h2.console.settings.trace=true
spring.h2.console.settings.web-allow-others=false
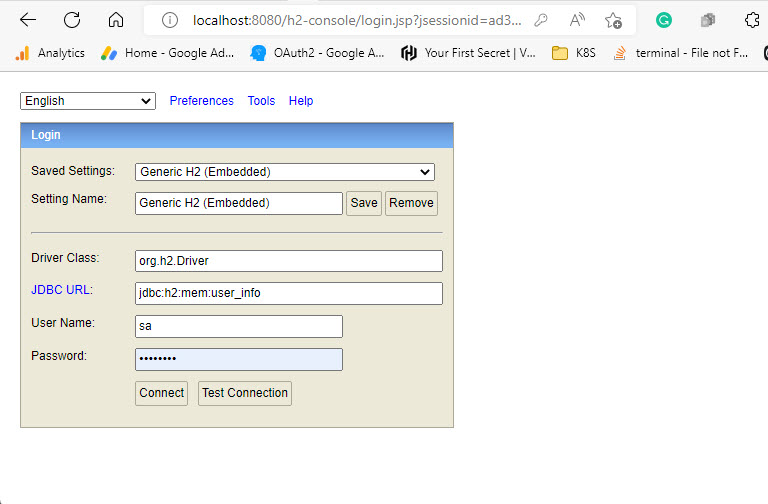
Now run your spring boot application and access the H2 DB console using the URL http://localhost:8080/h2-console. This will open the H2 database console in a web browser and you can connect to DB by using the database schema, user, and password given in application.property file

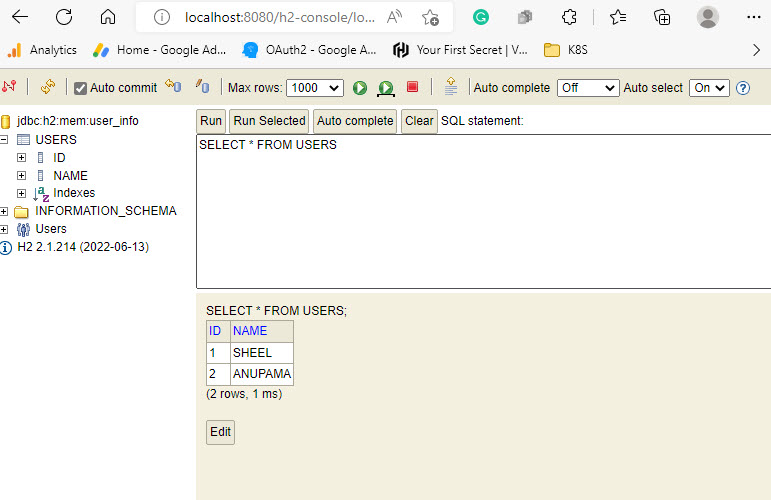
Using this console you can do basic DB DDL and DML operations. You can see all data populated automatically from data.sql file.

You can also use files in place of in-memory DB using H2. You just need to change spring.datasource.url as given below
spring.datasource.url=jdbc:h2:file:/data/user_info
You can download a complete working example with one rest API to list all users here with repository, service, adapter, and rest layer from here.

