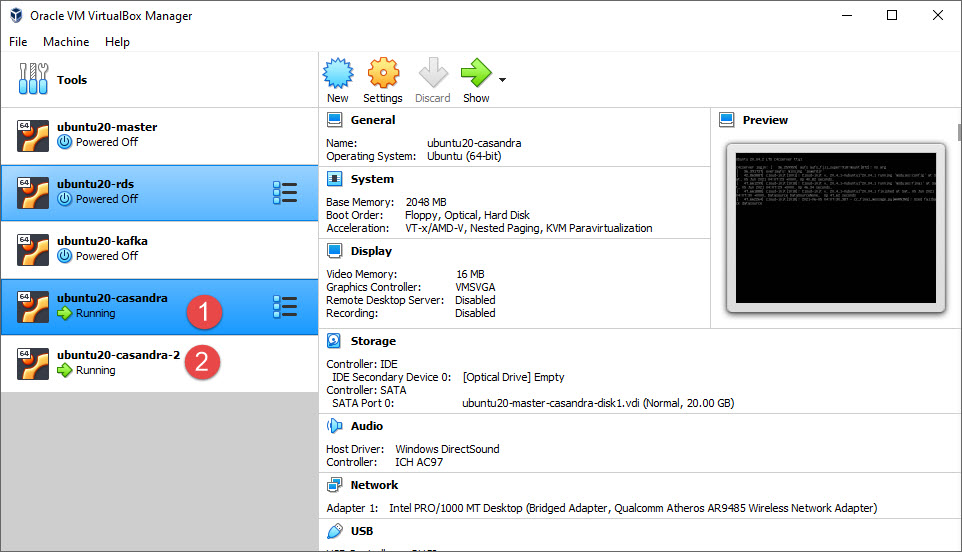
In this post, I am going to show you, how you can configure a simple Cassandra cluster using VirtualBox and Ubuntu server on Windows 10. You can easily learn the basics of the Cassandra cluster and use this setup for your learning and development purpose.
For this, you first need to install and set up Ubuntu 20 Server VM on Oracle VM VirtualBox.
For creating a cluster of two nodes, you need to configure 2 sessions of the Ubuntu server image. You can refer Apache Cassandra Installation on Ubuntu.
For creating two or more nodes you can just power off VM and clone to create a copy.
Now run both Ubuntu instances with Cassandra running. I will recommend using the putty clients to operate these ubuntu instances. Now check the IP of both instances using ifconfig or another command.

For this exercise my VM’s IP addresses are 192.168.1.22 and 192.168.1.23
Steps to create Apache Cassandra Cluster
The first and most important is to open ports so that Cassandra nodes and talks to each other. You need to open TCP ports on nodes (7000, 7001, 7199, 9042, 9160, 9142).
- 7000 – Internode communication (not used if TLS enabled)
- 7001 – TLS Internode communication (used if TLS enabled)
- 7199 – JMX (was 8080 pre Cassandra 0.8.xx)
- 9042 – CQL native transport port
- 9142 – Default for native_transport_port_ssl, useful when both encrypted and unencrypted connections are required
- 9160 – Thrift client API
On Ubuntu, you can use the UFW firewall manager, Run the following script on both nodes.
:$ sudo ufw allow 7000 \
&& sudo ufw allow 7001 \
&& sudo ufw allow 7199 \
&& sudo ufw allow 9042 \
&& sudo ufw allow 9160 \
&& sudo ufw allow 9142 \
Now stop Cassandra service on both nodes and clear old default data.
:~$ sudo service cassandra stop

:~$ sudo rm -rf /var/lib/cassandra/data/system/*
Now we need to change the Cassandra yaml configuration for creating the cluster. This file typically located at /etc/cassandra/cassandra.yaml
We need to edit the following entries in yaml file
cluster_name: The name of the cluster. This is mainly used to prevent machines in one logical cluster from joining another.
cluster_name: 'CassandraTestCluster'seed_provider:
# Addresses of nodes that are deemed contact points. Cassandra nodes use this list of hosts to find each other and learn the topology of the ring. I added my both hosts addresses, you can add more.
seed_provider:
  - class_name: org.apache.cassandra.locator.SimpleSeedProvider
    parameters:
         - seeds: "192.168.1.22,192.168.1.23"
listen_address: Address or interface to bind to and tell other Cassandra nodes to connect to. You must change this if you want multiple nodes to be able to communicate!
listen_address: 192.168.1.23rpc_address: The address that each Cassandra node shares with clients is the broadcast RPC address; it is controlled by various properties in cassandra. yaml: rpc_address or rpc_interface is the address that the Cassandra process binds to the Native transport server.
rpc_address: 192.168.1.23endpoint_snitch: A snitch determines which datacenters and racks nodes belong to. A snitch determines which datacenters and racks nodes belong to. They inform Cassandra about the network topology so that requests are routed efficiently and allows Cassandra to distribute replicas by grouping machines into datacenters and racks.
endpoint_snitch: GossipingPropertyFileSnitchand at the bottom of file add following entry
auto_bootstrap: The bootstrap feature in Apache Cassandra controls the ability for the data in the cluster to be automatically redistributed when a new node is inserted. The new node joining the cluster is defined as an empty node without system tables or data. Set is true or false.
auto_bootstrap: falseIn production, you should set this property to true or as per your requirement.
Now for summarising we have to change the following entries in cassandra.yaml
cluster_name: 'CassandraTestCluster'
seed_provider:
  - class_name: org.apache.cassandra.locator.SimpleSeedProvider
    parameters:
         - seeds: "192.168.1.22,192.168.1.23"
listen_address: 192.168.1.23
rpc_address: 192.168.1.23
endpoint_snitch: GossipingPropertyFileSnitch
auto_bootstrap: false
Now your cluster is ready. Start cassandra service
:~$ sudo service cassandra start
Testing Cassandra Cluster
To check status of the cluster run following command
:~$ sudo nodetool status
It will show following output i cluster is configures correctly
Datacenter: dc1
===============
Status=Up/Down
|/ State=Normal/Leaving/Joining/Moving
--  Address       Load        Tokens  Owns (effective)  Host ID                               Rack
UN  192.168.1.23  191.84 KiB  16      100.0%            2accf426-d5a5-4276-8376-930b25f9b8e5  rack1
UN  192.168.1.22  191.84 KiB  16      100.0%            279990bb-8358-4d98-ac3f-80baac2210b4  rack1
If both or one node is not running then you can check log in that instance using tail command and fix the configuration.
:~$ tail -f /var/log/cassandra/system.log
You can also check using cqlsh command using any of IP of your cluster
:~$ cqlsh 192.168.1.23 9042and it will show following output
Connected to CassandraTestCluster at 192.168.1.23:9042
[cqlsh 6.0.0 | Cassandra 4.0 | CQL spec 3.4.5 | Native protocol v5]
Use HELP for help.

